Hi Stampin' Friends!
Make sure to Subscribe to my YouTube Channel
Here: https://www.youtube.com/channel/UCEdyhytybK04CDf3j8-Qv0Q
Subscribe to my New Email List if you haven't yet!!
Hi Stampin' Friends!
Make sure to Subscribe to my YouTube Channel
Here: https://www.youtube.com/channel/UCEdyhytybK04CDf3j8-Qv0Q
Subscribe to my New Email List if you haven't yet!!
Annual Christmas Giftables Class
Available to Order NOW!

You will make 7 Different Projects in the Christmas Giftables Class!
You will receive all the Supplies to make the Projects. You will need to have your own Stamp Sets to stamp the images and text for each item. You will receive dimensions and instructions + a tutorial video to complete your class online! If you do not have the Stamp Sets, you can purchase them from my Online Store... www.tinashaw.stampinup.net.
Cost is $30 + postage. Please let me know if you are interested by emailing me at tinashaw2016@outlook.com


Here are the Cards we made in yesterday's Class!


I'm so Excited to have a New Email Newsletter coming out to all of you, my Stampin' friends!
Please Sign up to receive the New Newsletters!!
Explosion Box #2
So, you saw the first Exploding box I made in the previous post??
This one is a "step up" from the real Red one!!
I use Balmy Blue, Pacific Point and Whisper White Cardstock.
Snowflake Splendor DSP (have I mentioned that is my Favorite Print with the tiny Snowflakes???)

Explosion Box Dimensions
Outside
Box
Cardstock 12 x 12” Scored at 4” on all sides.
DSP (8) 3 ¾ x 3 ¾ “. Glue on each square, Inside
and outside of Box.
Score from score line of the
inside corner to the corner of the paper and fold at the “mountain”. Cut out the Heart in each corner using
pattern.
Inside Layer; Whisper White 2 ½”
Circle or Ovals
Cardstock 3” Circle or Ovals
Using Stamps and Dies Decorate as
Desired.
2nd
Layer
Cardstock 10 ½ x
10 ½” Scored at 3 ½” on all sides.
DSP (8) 3 ¼ x 3 ¼” Glue on each square.
Cards inside the pockets; Whisper
White 2 ½ x 2 ¼”
3rd
Layer
Cardstock 9 x 9”
Scored at 3” on all sides.
DSP (8) 2 ¾ x2 ¾” Glue on each
square.
Inside the Pockets; Cards Whisper
White 3 x 2” Use Scalloped Tag Topper
Lid
Cardstock 7 x 7” Scored at 1 3/8” on all sides.
DSP (4 ) 1 1/8 x 4”and 4 x 4’ for the top of the lid.
Waterfall
Piece for the center of the box.
Cardstock 12 x 2
¾” Scored at 2 ¾, 5 ½, 8 ¼, & 11”
Cardstock 8 ¼ x
2 ¾” Scored at 2 3/4 & 5 ½” Glue the 2 pieces together.
DSP (12 )2 ½ x 2 ½” Glue on all
the squares except the bottom that attaches to the inside center of the box.
Whisper White Tags: 2 ¼ x 2” Use
Scalloped Tag Topper.
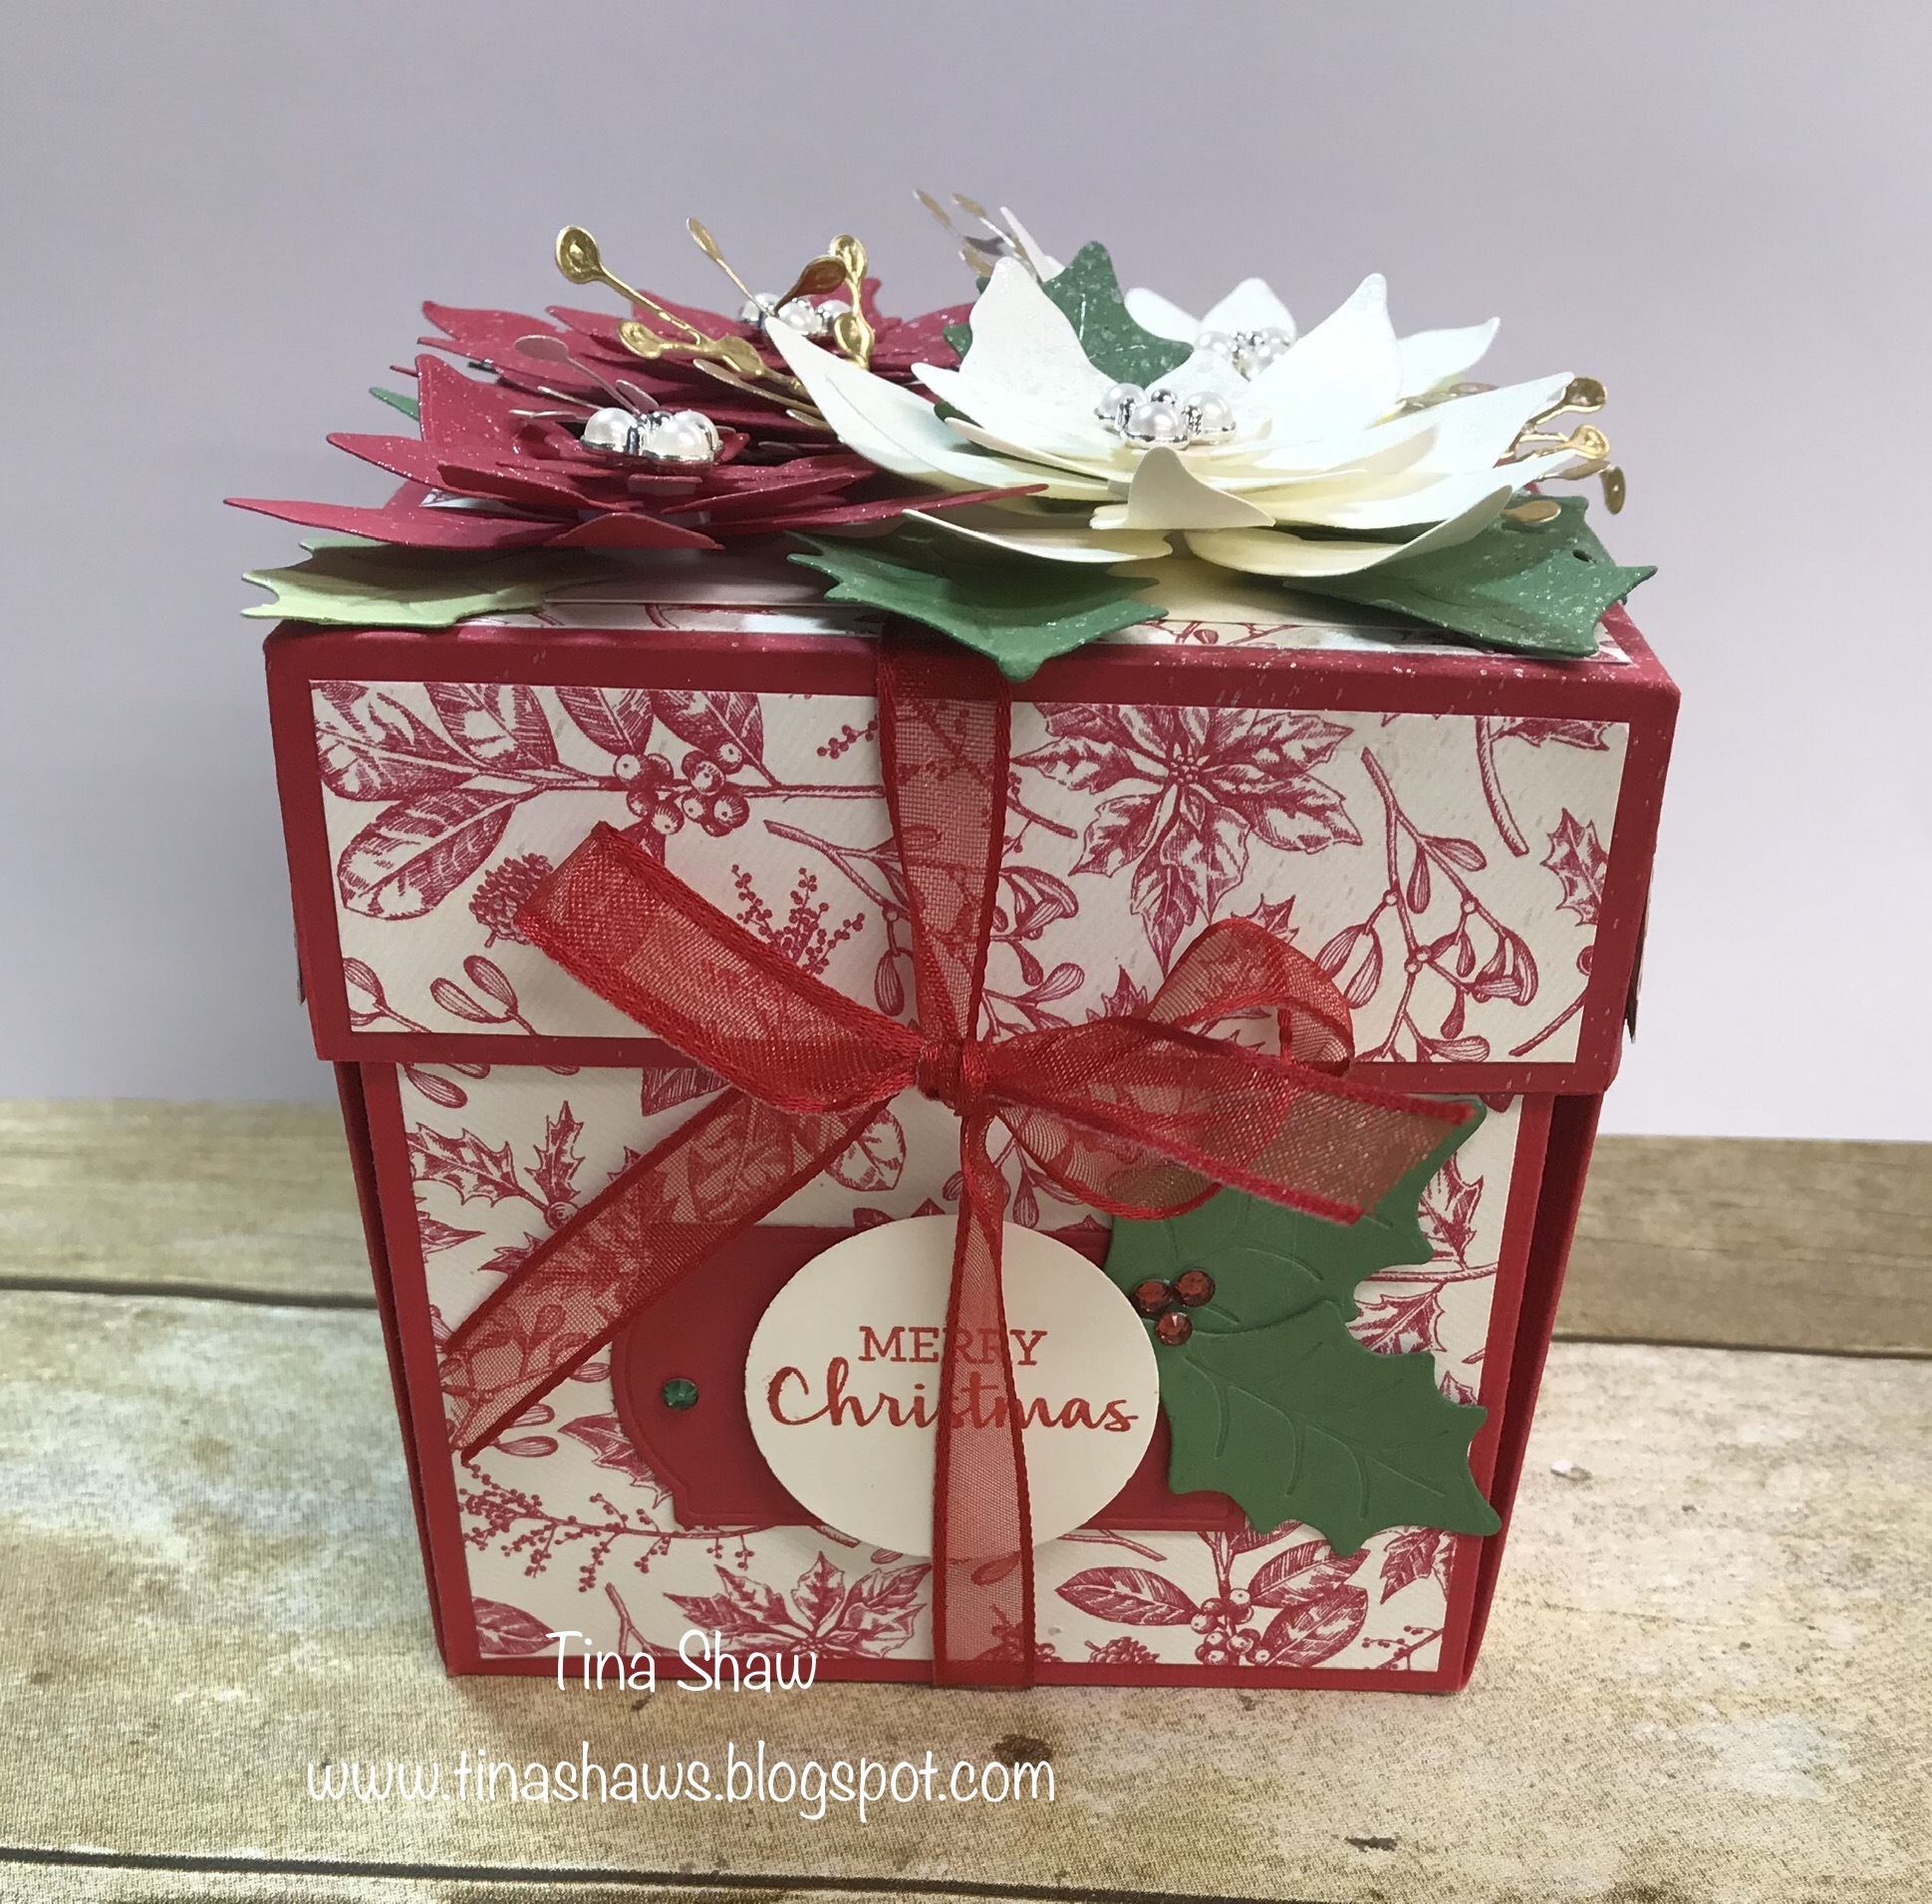
Christmas Explosion Box
WOW is all I can say!!
I love how it turned out, but I'm so picky in deciding what to stamp and die cut, etc!!
I used SEVERAL stamp sets and Die Sets to make this Exploding Box
Including:
Poinsettia Petals Bundle
Wishes & Wonders Bundle
Snow Wonder Bundle
Tag Buffet
Banner Year
In The Pines Dies
For Unto Us
Christmas Gleaming
Gift Wrapped & Wrapped in Christmas
OF COURSE, you wouldn't need to use ALL these sets, but I have them, so I thought, why not!!??


Explosion Box Dimensions
Outside
Box
Cardstock 12 x 12” Scored at 4” on all sides.
DSP (8) 3 ¾ x 3 ¾ “. Glue on each square.
Score from score line of the
inside corner to the corner of the paper and fold at the “mountain”. Cut out the Heart in each corner using
pattern.
2nd
Layer
Cardstock 10 ½ x
10 ½” Scored at 3 ½” on all sides.
DSP (8) 3 ¼ x 3 ¼” Glue on each square.
3rd
Layer
Cardstock 9 x 9”
Scored at 3” on all sides.
DSP (8) 2 ¾ x2 ¾” Glue on each
square.
Lid
Cardstock 7 x 7” Scored at 1 3/8” on all sides.
DSP ( 4 ) 1 1/8 x 4”and 4 x 4’
for the top of the lid.
Waterfall
Piece for the center of the box.
Cardstock 12 x 2
¾” Scored at 2 ¾, 5 ½, 8 ¼, & 11”
Cardstock 8 ¼ x
2 ¾” Scored at 2 3/4 & 5 ½” Glue the 2 pieces together.
DSP (12 )2 ½ x 2 ½” Glue on all
the squares except the bottom that attaches to the inside center of the box.
The 3 Different layers inside!


The Center Inside Waterfall Section:

Tri-Fold Shutter Card!
Wishes & Wonder Bundle, In The Pines Bundle and Poinsettia Dies

Details
Mossy Meadow Cardstock 5 1/2 x 12" Score @ 2, 4, 8, 10" on the short side.
Turn Cardstock to the long side and cut 1 1/2 " from the edge from the 2" score line up to the 10" score line , flip and cut the other side the same.
Heartwarming Hugs DSP
Match sizes with Card diagram below:
A. 1 3/4 x 5 1/4" (2)
B. 1 3/4 x 1 1/4" (4)
C. 3 3/4 x 1 1/4" (2)
D. 3 3/4 x 2 1/4" (1)
E. 1 3/4 x 2 1/4"
Whisper White 3 1/2 x 2" for the large front Panel.
Whisper White 3 3/4 x 2 1/4" for the back large Panel ( for the Message)
Key:


Cherish the Season
Love the Sentiment on this Card!! Reminds me of 'It's a Wonderful Life'
Cherish the Season Bundle
Perfectly Plaid Stamp Set
Christmas Means More Stamp Set


Warm Hugs Bundle and Wrapped in Christmas Stamp Set
My first time using this Cute Mini Coffee Carrier and Cups!!
Heartwarming Hugs Suite


Snow Wonder Bundle
Such a Cute Snowman!!


