Sunday, August 30, 2020

Tag Buffet Project Kit


Tag Buffet Project Kit


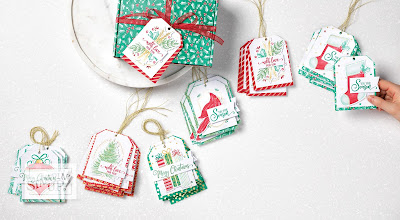
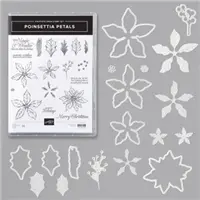
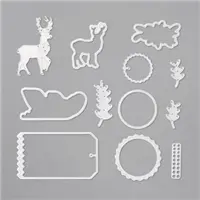
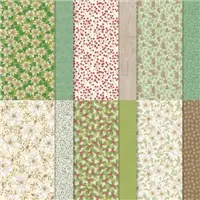
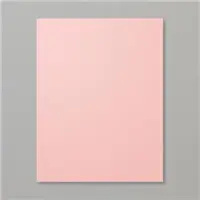
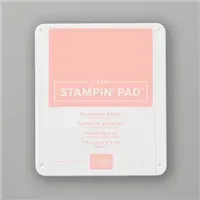
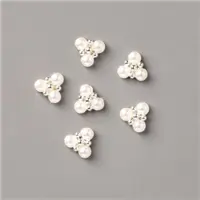
Above is what is included in the Project Kit.
 So, of course you will want to add the Darling Tag Buffet Stamp Set!


This Kit is so Easy to make Tags and you can also make Matching Cards, like I did!
I just added Garden Green, Shaded Spruce, Real Red, Whisper white and Gold Foil Cardstocks!


The Beautiful Printed Designs are EASY to pop out!
This is only four of the six different designs!


The Inside of the cards!
I hope you will give it a try, you will LOVE them!!
Let me know what you think by leaving a comment below! 

Aren't these just adorable??!!

So Cute!
     
I added Holiday Rhinestones to 'Decorate' the trees!

Love this Ornament Card and Tag!

How cute are the Presents?!

I added Wink of Stella o the Cardinal for extra Sparkle!


Thanks for Stopping by,
Tina


Thursday, August 27, 2020

Ornamental Envelopes Card!!

 Yep, I finally made a Card and Envelope with the Ornamental Envelopes Stamp Set and Envelope Dies! 

Love, Love, Love how it turned out!!

It was so much fun to make up my own idea for the Wreath. I stamped the Twig image first in Early Espresso ink on the Crumb Cake Layer. Then I stamped the Leaves in Mossy Meadow Ink, then topped it off with the Berry stamp in Versamark and heat embossed with white embossing powder!
Card Base Real Red 8 1/2 x 5 1/2"  scored at 4 1/4"
Mossy Meadow Layer 4 x 5 1/4"
Crumb Cake Layer 5 1/8 x 3 7/8"

Strip of real red 1 x 3 7/8"
Scrap of Crumb Cake - Stamped Happy Christmas in VersaMark ink pad and heat embossed with White Embossing Powder. I cut it out using the Stampin Up Cut and Emboss Machine with a die from Snow Time Dies.
I popped up 6 real red small Poinsettias on the wreath and a Double Bow from Linen thread. Added pearls.

Inside, I used a layer of Crumb Cake Cardstock 5 1/4 x 4"
and a layer of whisper White 5 1/8 x 3 7/8
I stamped the Verse from Tag Buffet with Early Espresso Ink  and little bow and holly from the same set.

 I really like the way it turned out!


The Envelope Dies are super easy to use! 
Let me know if you have any questions or comments!!


Monday, August 24, 2020

Snowflake Wishes Shutter Fold Card

 Well, I guess I'm liking the Shutter Fold Cards now!! Two days in a row!! 

The Video Tutorial for the Poinsettia Petals Shutter Fold Card is the one to follow for this card as well. Just change up the Stamp Set from Poinsettia Petals to Snowflake Wishes and Dies!


Isn't it so pretty?! and Sparkly!?!


   Don't you just LOVE to open up a Surprise ???


Sunday, August 23, 2020

Poinsettia Petals Shutter Fold Card

 Love this Shutter Fold Card using Poinsettia Petals Bundle!! Also Love the Heartwarming Hugs DSP


Dimensions:
Card Base Real Red 8 1/2 x 5 1/2" scored at 2 1/8  & 6 3/8'
Poinsettia Place DSP  (2)  1 7/8 x 5 1/4" and 2 3/4 x 5 1/8"
Pear Pizzaz 3 x 5 3/8"
Shutter pieces Real Red  (2) 2 1/4 x 3 1/4" scored at 1/2" on 3 1/4' side 
Use the Banner Triple punch on the 2 1/4 " ends
Belly Band  Real Red 1 x 11" 
Real Red and Mossy Meadow Cardstock to cut out poinsettia and leave dies.


The Envelope Dies are such a nice touch to add to the Cards using the Poinsettia Place DSP


Friday, August 21, 2020

Coming Home Card!

 What a FUN Stamp Set is Coming Home Bundle!!

This was my first 'Play' with the Trimming the Town DSP and Stamps from the Suite!

 I cut out the houses and trees from the DSP using the dies from the Home Together Dies and also to get the Snow 'Drifts'


I also used Tag Buffet Stamp Set for the Greeting on the front of the card and on the inside.
The cute little car with the tree on top stamp is the Festive Post set.


Dove of Hope Card

 The Dove of Hope Bundle is a Beautiful Set to make a Christmas Card !

I have posted the Video Tutorial below! Let  me know if you make it!!


Tuesday, August 18, 2020

Yesterday's Card Class!

 Here are the 3 Cards from Yesterday's Card Class!

They were very Easy and Quick!!


Love the Little pouty Kitty!!


Inside


The Dove of Hope Card is cased partly by another Demo Akiko Sudane


Saturday, August 15, 2020

Poinsettia Petals in Balmy Blue

Poinsettia Petals Bundle.........AGAIN!!!

I also used For Unto Us Stamp Set.

 Oh My Gosh!! Have I told you that I LOVE the Poinsettia Petals Stamp Set?!?!I can't decide which color I like the best??? I think I REALLY like the Blues!!!!


I used Balmy blue for the Card Base, 1st layer is Pacific Point and the top layer is the Beautiful Snowflake Splendor DSP!!


The Leaves are in Balmy Blue and Pacific Point. I sponged them with Balmy Blue Ink!


I stamped the inside with Balmy Blue poinsettias and the Christmas Begins with Christ in Pacific Point.


The Back of the Envelope


The Front of the Envelope

Dimensions:
Card Base Balmy Blue 8 x 7" Scored @ 3 1/2"
1st Layer Pacific Point 7 3/4 x 3 1/4"
2nd Layer Snowflake Splendor DSP 7 1/2 x 3"
Whisper White Strip for Greeting 4 1/2 x 1" Stamp the Verse with Pacific Point Ink. 
Whisper White 7 3/4 x 3 1/4"for the Inside of Card. Stamp Poinsettias in Balmy Blue and the Greeting with Pacific Point Inks.
Balmy Blue Scraps to stamp the Poinsettias with Versamark and Heat Emboss with White Embossing Powder. Cut out with Poinsettia Dies and Sponge with Balmy Blue Ink.  Glue flower layers together with Stampin' Seal. Attach to the front of the Card on the DSP layer with Dimensionals.
  Scraps of Balmy Blue and Pacific Point  for the Sprigs and Leaves to be cut out with the dies.Sponge the Leaves with Balmy Blue Ink. Attach underneath the Poinsettia. 
Attach the Greeting on the front as pictured. 
Embellish with one Braided Pearl and Blue adhesive backed Gems.


Envelope
8 1/2 x 11" piece of Printer Paper. 
Scored at 2 5/16 and 6 1/8" on the shorter side.
Scored at 1 and 9 1/4" on the longer side. 
Fold on all Score lines and cut off the 4 corner rectangles. Taper the edges of the flaps. Glue the Center of the back side together and the bottom 1" flap.
Stamp as desired!

Watch the Video!
And, make sure to Subscribe to my YouTube Channel


Thursday, August 13, 2020

Poinsettia Petals SlimLine Blushing Bride Card!

 Well, I had an extra Poinsettia cut out from my previous Card, so I couldn’t let it go to waste!! LOL!


The Blushing Bride Card Base is 8 x 7" Scored at 3 1/2"
Mossy Meadow layer 7 3/4 x 3 1/4"
Heartwarming Hugs DSP layer 7 1/2 x 3"
Blushing Bride Strips 1/2 x 7 1/2" and 3 x 1/2"
Stamp The Blushing Bride ink on Blushing Bride cardstock with the 3 Poinsettia stamps, then cut out using the Dies from the set.  Sponge the Poinsettia flowers with Blushing Bride ink. Glue the 3 layers of the flower together. Cut out 3 Mossy Meadow and 3 Pear Pizzaz leaves with the dies and sponge them with Pear Pizzaz ink. Using the Sprig die from the set, cut out 2 sprigs in blushing Bride and 2 in Silver Foil. 
Adhere all the layers to the front of the card as pictured. 
 
Stamp Warm Wishes  on a 3/4 x 3 1/2" Whisper white strip. Banner the end with the Banners Pick a Punch and glue on top of Blushing Bride strip.
Using a glue dot adhere the Beaded Pearl to the center of the poinsettia. 

Here is the Envelope I made to fit the card!
 Just out of copy paper!
8 1/2 x 11" copy paper scored at 2 5/16  and 8 1/2 on the short end and score at 1 and 9 1/4" on the long end. Fold and trim end at an angle and glue the seam down the middle of the back and bottom flap of the envelope.


Monday, August 10, 2020

Poinsettia Petals Double Gate Card

Oh. My. Gosh. I Love this Card!!! It was SOOOO much fun to make!!
Card Recipe:
Poinsettia Place DSP 5 1/2 x 12"
Score at 2,4,8 and 10"
Real Red Cardstock 3 3/4 x 5 1/4'
Very Vanilla Cardstock 3 1/2 x 5"
Real Red CS 3rd Largest Layering Square
Very Vanilla CS 2nd from Largest Stitched Square Die


When you open up the card, you see the beautiful inside!
Watch the video to see how to cut the triangle off the top edges of the front of the card!
Let me know if you have any questions or comments!
Be sure to Subscribe to my Youtube Channel!


Click on the Icons below to order from my Stampin Up Store,

Thanks for Looking,
Tina